Internet Connected Plant Pot
 I got an Arduino Yun so I could play around with it. Given my chilli plant has recently died, I’ve used it and a soil moisture sensor to tell me if I need to water the plant.
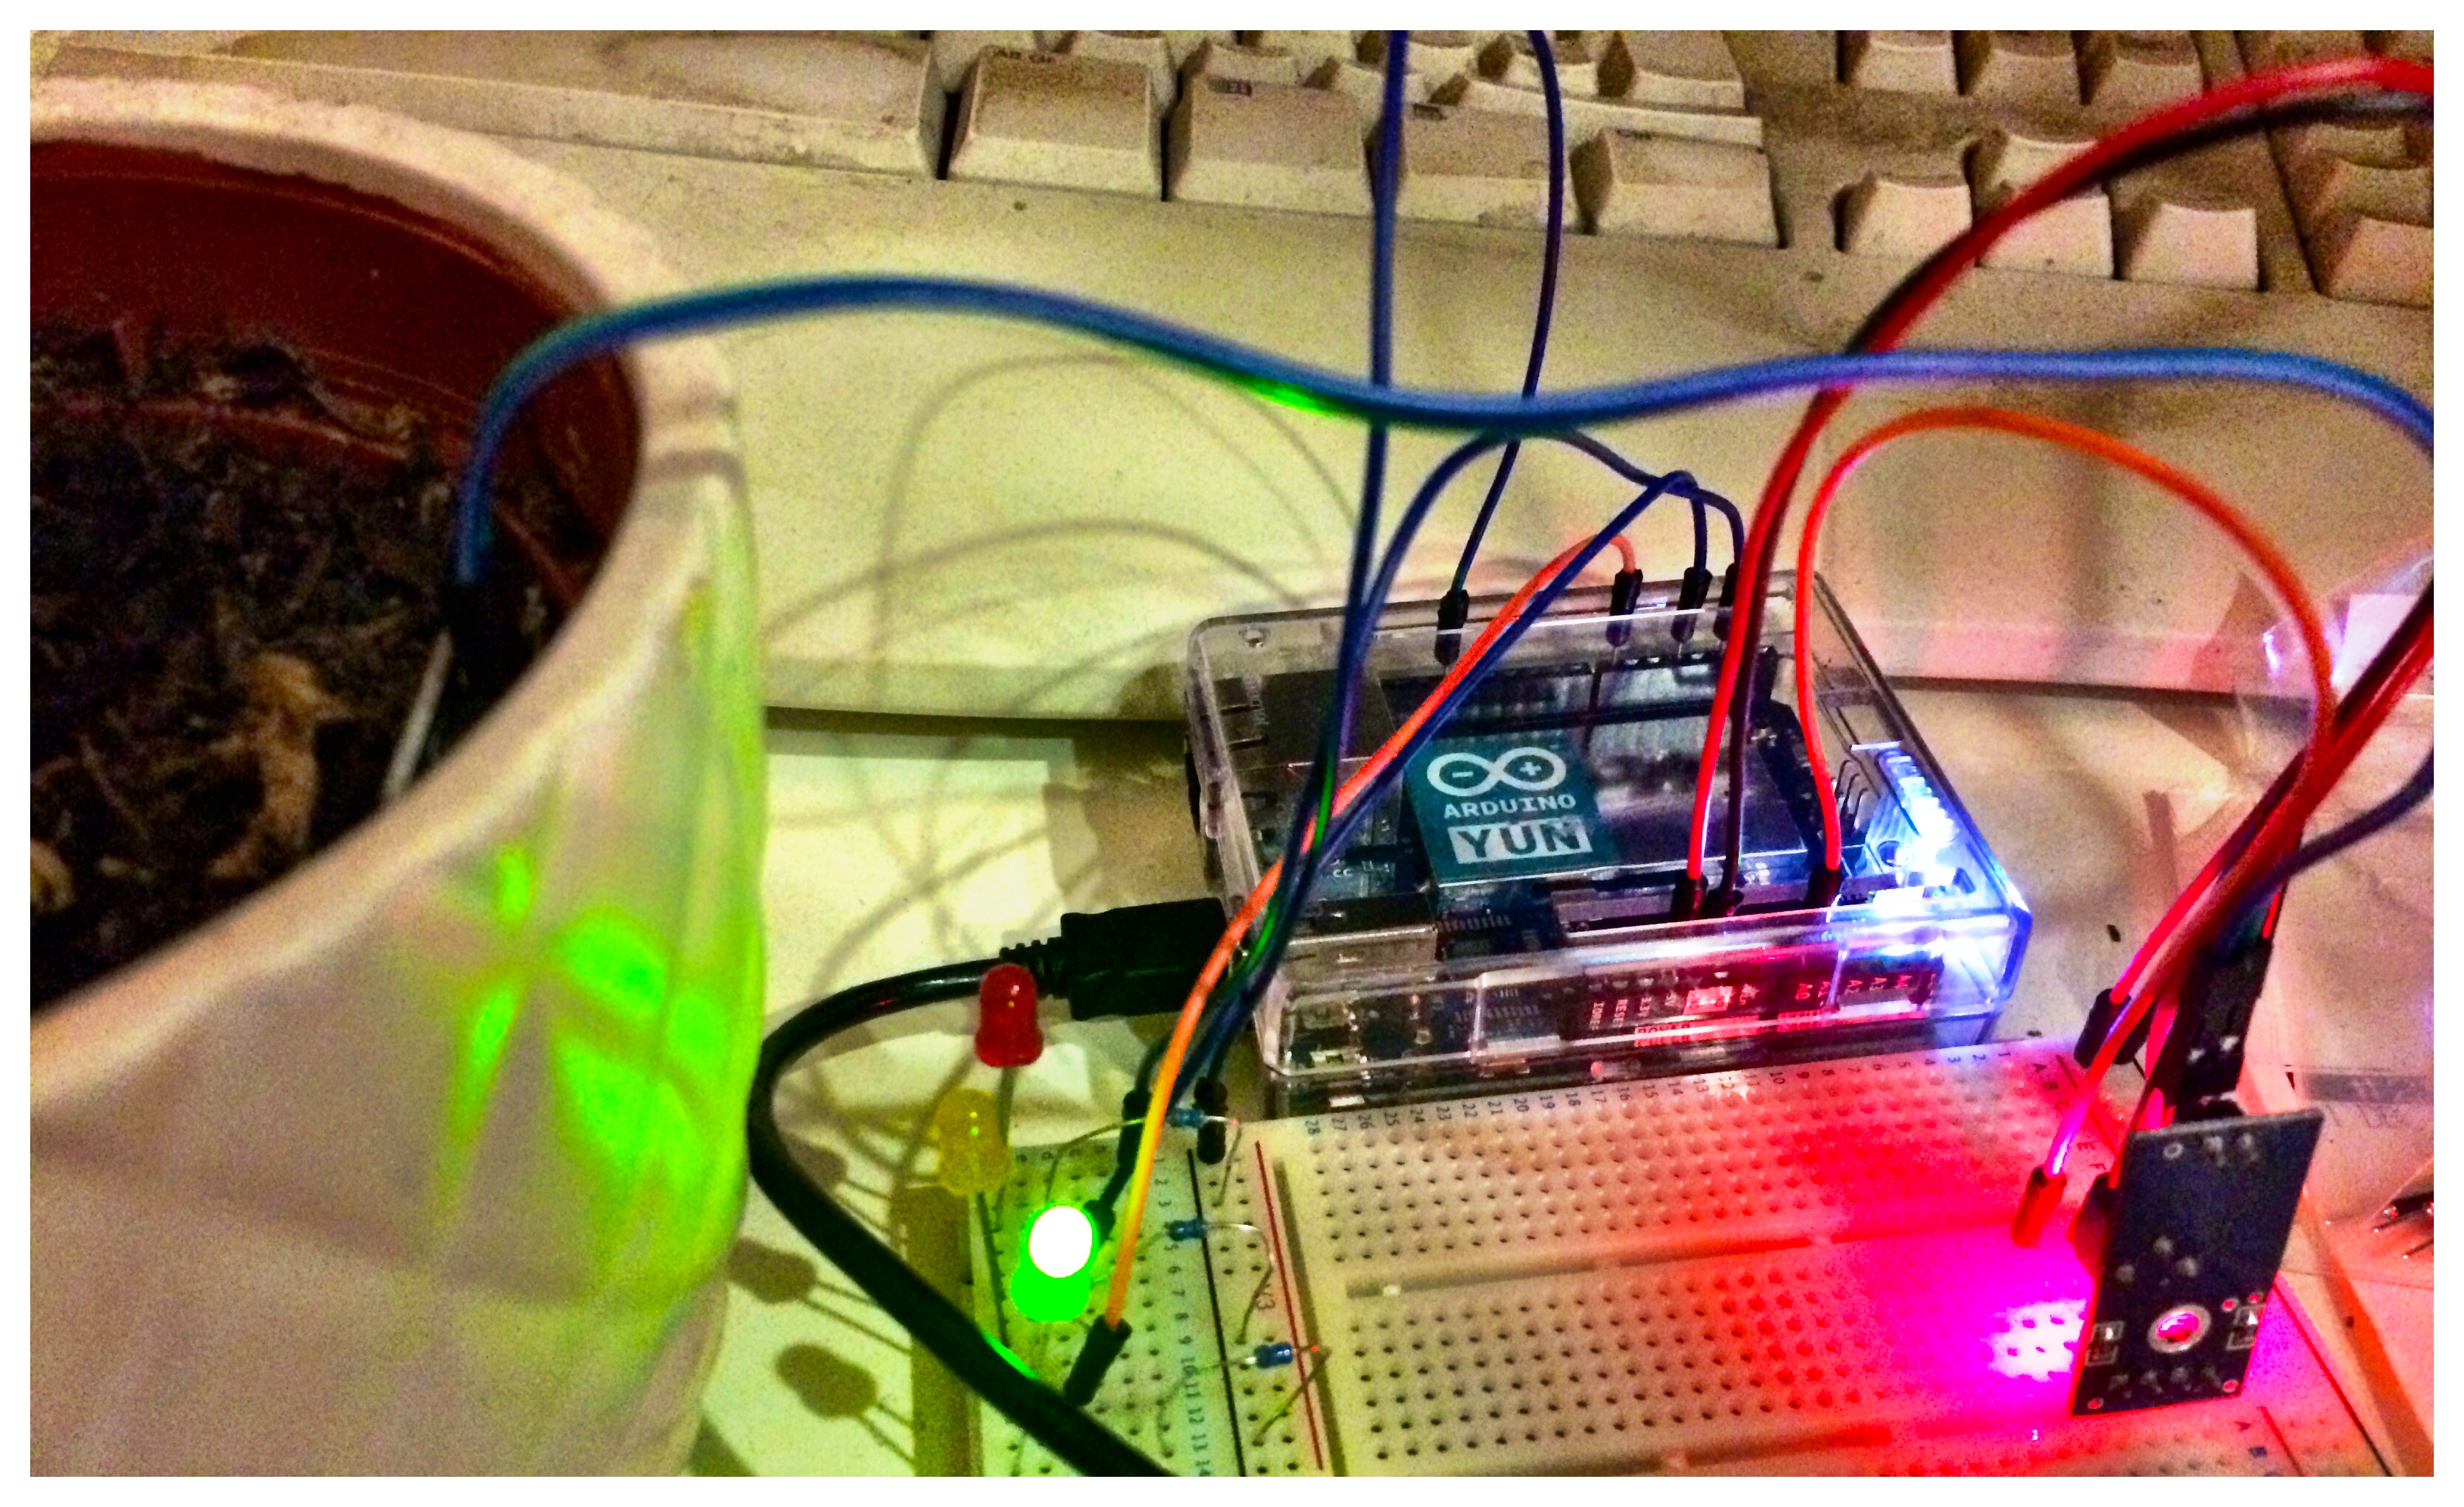
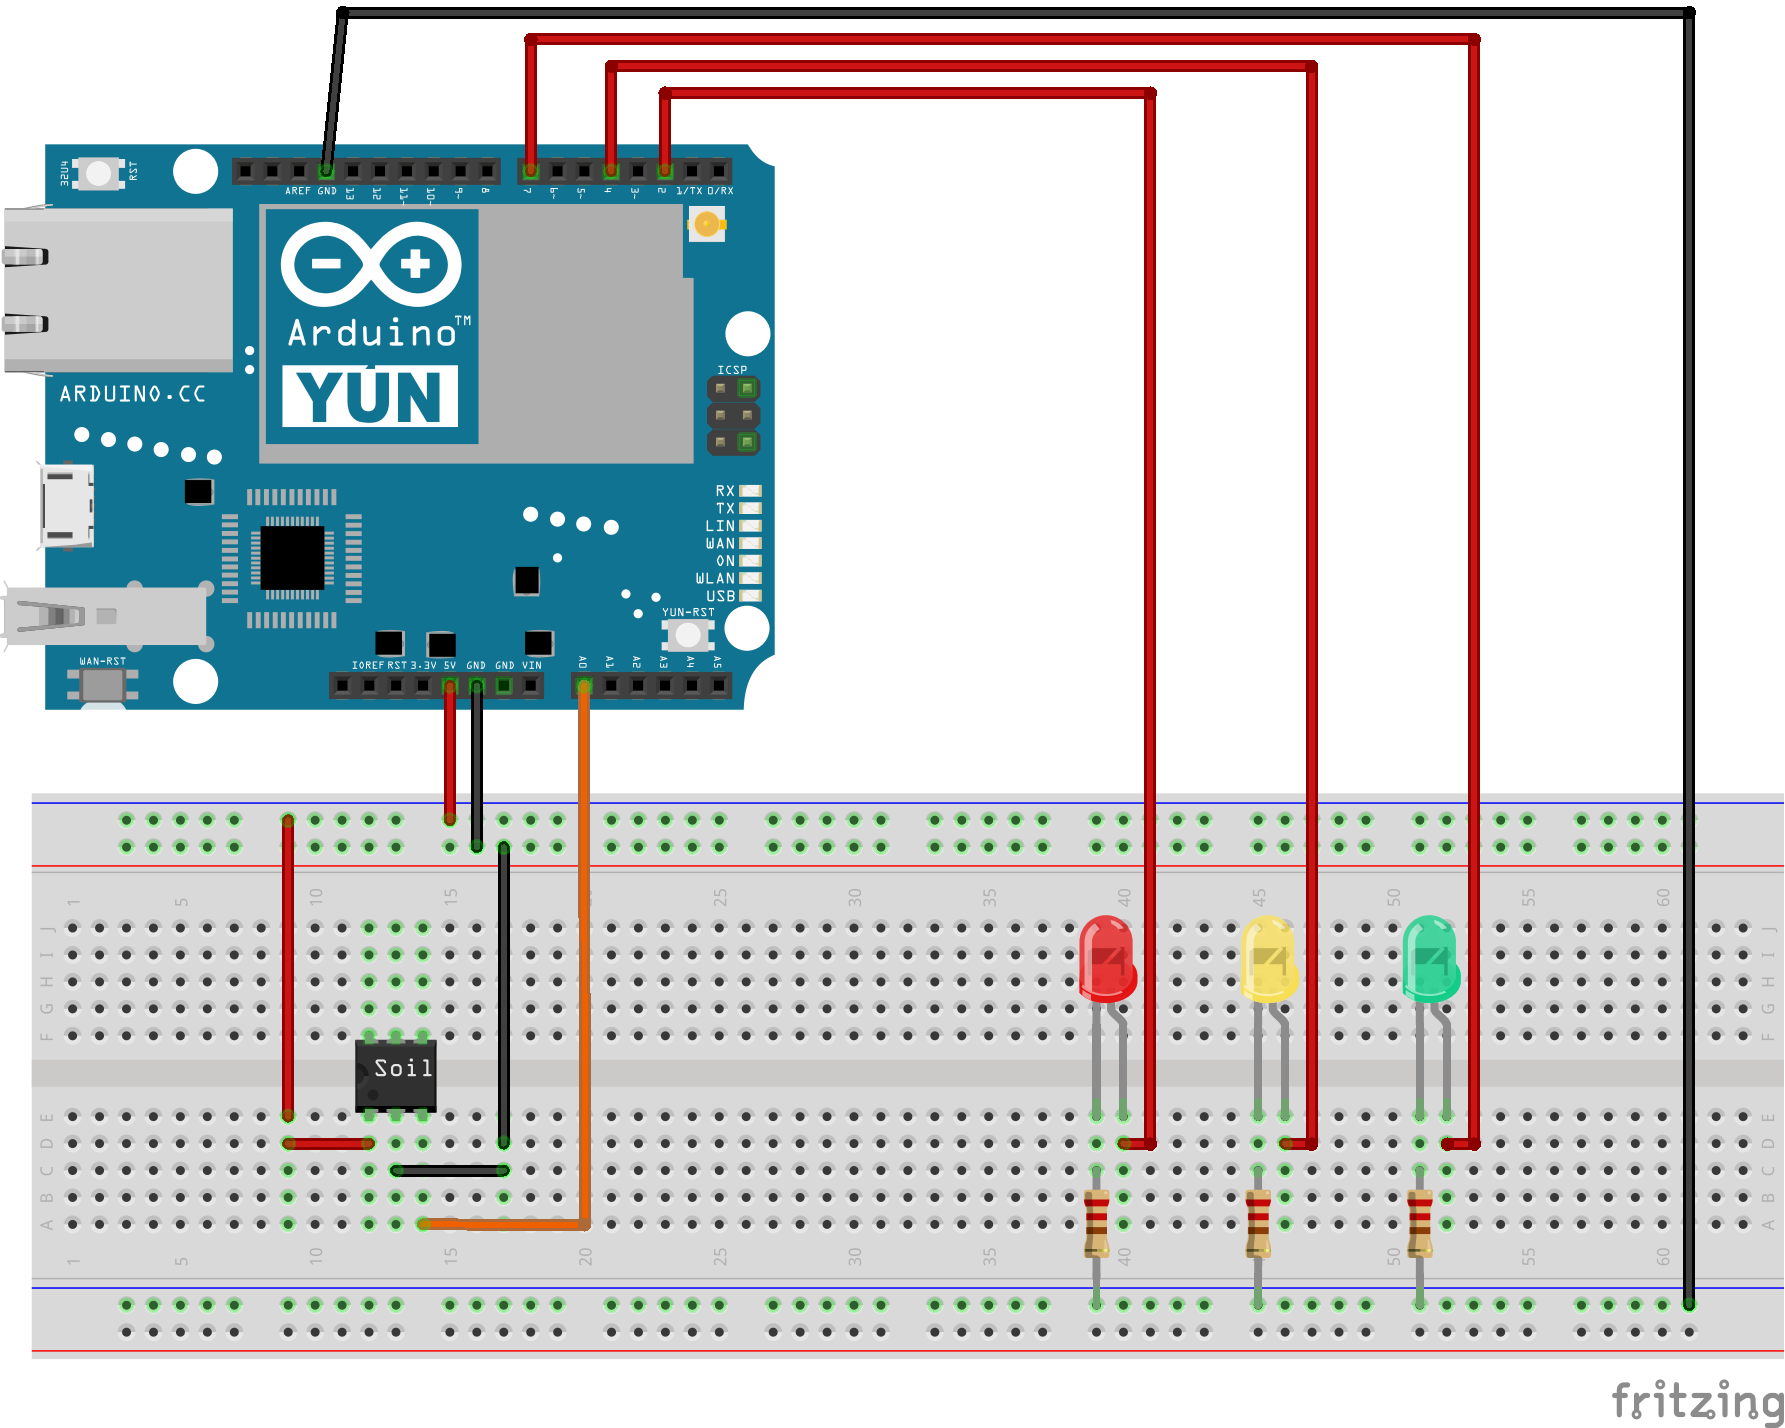
Let’s start with the the circuit. Connect a red LED to digital pin 2 in series with a 160ohm resistor. Add a yellow LED in series with a 160ohm resistor to digital pin 4 and a green LED inline with a 160ohm resistor to digital pin 7. We’ll use this to show the moisture state of the soil – green for good, red for watering needed. Connect the common ground pins of these to the ground on the digital pins side.
For the soil sensor, connect the Arduino’s 5v pin to Vcc, Arduino’s Gnd to Gnd, and the Arduino’s A0 pin to the AO (Analogue Output) pin on the interface board. We leave the DO (Digital Output) pin disconnected – we don’t use this. The other pins on the interface board simply go to the prongs on the crcuit board sensor.
See the diagram to show the circuit in more detail.
For the software, you should set the D2, D4 and D7 pins to Output mode so we can drive the LEDs, plus turn them all off, start the Yun bridge and serial output for debugging. I’ve kept the PWM-capable pins free for future use.
void setup() { pinMode(2, OUTPUT); pinMode(4, OUTPUT); pinMode(7, OUTPUT); digitalWrite(2, LOW); digitalWrite(4, LOW); digitalWrite(7, LOW); Bridge.begin(); Serial.begin(9600); Serial.println("Hi from your Arduino"); } |
Bridge.begin();
Serial.begin(9600);
Serial.println("Hi from your Arduino");
}
Following that, we should read the soil sensor, set the LEDs and use the Bridge library to execute Curl to put the sensor readings onto a DropWizard service.
void loop() { delay(10000); // every 10 seconds... int moistureSensorReading = analogRead(0); Serial.println(moistureSensorReading); // Update the on-board LEDs if (moistureSensorReading > 800) { digitalWrite(2, HIGH); digitalWrite(4, LOW); digitalWrite(7, LOW); } else if (moistureSensorReading < 500) { digitalWrite(2, LOW); digitalWrite(4, LOW); digitalWrite(7, HIGH); } else { digitalWrite(2, LOW); digitalWrite(4, HIGH); digitalWrite(7, LOW); } String curlCommand = "curl -I -XPUT http://10.0.0.2:8080/moisture1/" + timeString + "/" + String(moistureSensorReading); Serial.println(curlCommand); Process curl; curl.runShellCommand(curlCommand); String curlResponseString; while (curl.available()) { char c = curl.read(); curlResponseString += c; } Serial.println(curlResponseString); } |
int moistureSensorReading = analogRead(0);
Serial.println(moistureSensorReading);
// Update the on-board LEDs
if (moistureSensorReading > 800) {
digitalWrite(2, HIGH);
digitalWrite(4, LOW);
digitalWrite(7, LOW);
} else if (moistureSensorReading < 500) {
digitalWrite(2, LOW);
digitalWrite(4, LOW);
digitalWrite(7, HIGH);
} else {
digitalWrite(2, LOW);
digitalWrite(4, HIGH);
digitalWrite(7, LOW);
}
String curlCommand = "curl -I -XPUT http://10.0.0.2:8080/moisture1/" + timeString + "/" + String(moistureSensorReading);
Serial.println(curlCommand);
Process curl;
curl.runShellCommand(curlCommand);
String curlResponseString;
while (curl.available()) {
char c = curl.read();
curlResponseString += c;
}
Serial.println(curlResponseString);
}
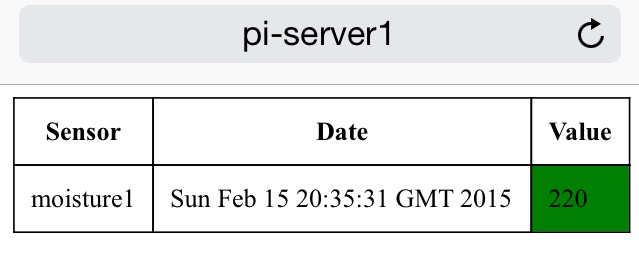 This, alongside with my DropWizard service results in a website which displays the soil moisture. And, if the internet fails, then the LEDs warn me of impending drought.
Source code located in Git. DropWizard code located under src, Arduino code under the Arduino directory.
This is my personal blog - all views are my own.